Posts

Showing posts from 2016

New Chess Graphics for Chess for Android

Image
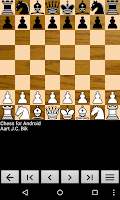
Bryan Whitby, who contacted me earlier to tell about very cool USB chess board projects , contacted me recently with a very generous offer to use his awesome chess graphics in Chess for Android . I am very thankful, since these graphics look really good, and combine well with the various board types already supported. So, expect an updated on Android Play and my website really soon! And, thank you Bryan!

Micro-KIM Tutorial: Brightness of LED Display

Image
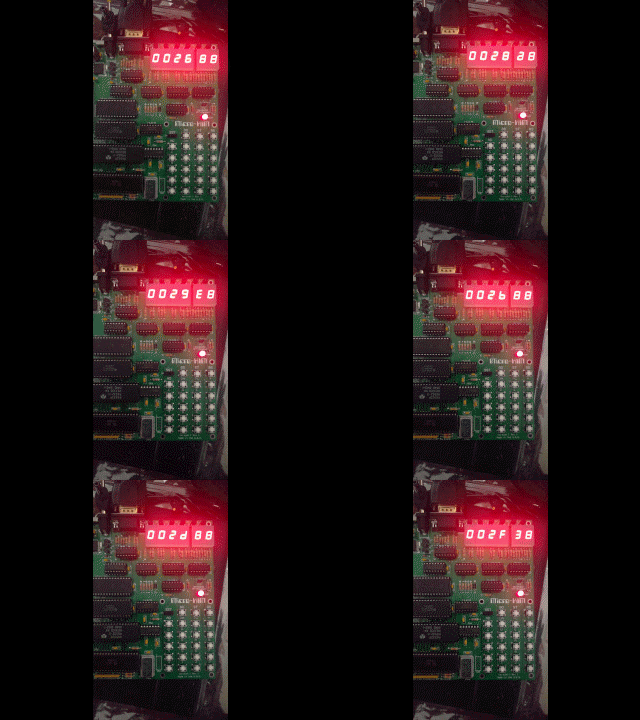
A demo is a program that shows off the abilities of a computer or programmer, sometimes even beyond the limits of an original architectural design. For example, a well-known demo theme on the Commodore 64 consists of rendering sprites in the border, i.e. outside the area originally destined for rendering sprites. This tutorial presents demos that use the LED display beyond its (probable) original purpose: adjusting the brightness of characters or even segments. As shown in the previous tutorial, a refreshing loop is necessary to show all 6 characters on the LED display. Here, the refreshing rate directly defines the brightness of these characters. Simply looping around yields maximum brightness, while lowering the refresh rate dims the screen. This idea can also be used to adjust the brightness of parts of the LED screen (characters or even individual segments within the characters). To illustrate this effect, let's modify the program of the previous tutorial (the source

Micro-KIM Tutorial: The LED Display

Image
The following schematic illustrates what is fun about retro computing: the complete schematic of a microcomputer fits on a single page (a higher resolution PDF can be downloaded from the Briel Computers website). Micro-KIM Schematic. Courtesy Vince Briel - Briel Computers The schematic shows that the 6 character LED display is controlled through some selection logic by the data ports of the 6532 RIOT. Because the 16 pins of the two 8-bit data ports A and B would not have sufficed to control all characters in the LED display simultaneously, instead a few bits of B select one character (value 9 selects the first, value 11 the second, etc.) while the lower 7 bits in A are used to control the 7 segments of that particular character (bit 0 controls the top segment, bit 1 upper right segment, etc.). Note that with this scheme, it is possible to set one character and "go on with the program", as I showed in an earlier tutorial by displaying a very bright 8 in the

Micro-KIM Tutorial: The Monitor Program

Image
A simplified memory map of the Micro-KIM is shown below. This tutorial explores the 2K EPROM,  leaving a more detailed exploration of the free RAM and 6532 RIOT for later.  Address space $1400   to   $173f  is unused i n the standard Micro-KIM kit configuration.    +-----------+   | 2K EPROM   |$1fff   | monitor   |   | program   |$1800   +-----------+   | 6532 RIOT |$17ff   | I/O, timer|   | and RAM   |$1740   +-----------+   | optional  |$173f   | I/O, timer|   | and RAM   |$1400   +-----------+   |           |$13ff   |  5K RAM   |   |           | $0000   +-----------+ Addresses  $1800 through  $1fff  are taken by the 2K EPROM, which is a read-only memory area that stores the 6530-003 and 6530-002 parts of the monitor program. You can, of course, inspect all  individual bytes in the address mode on the Micro-KIM kit, but I recommend reading the assembly listing of the monitor program in the appendix of the Setup and User's Manual of Briel Computers. The c

Micro-KIM Tutorial: A First Assembly Program

Image
At the lowest level, the 6502 executes numerical machine code. For example, the following bytes in hexadecimal format constitute a simple program that displays a single 8 on the LED display of the Micro-KIM.   a9 ff 8d 40 17 a9 09 8d 42 17 4c 0a 02 Let's enter this program into the memory of the Micro-KIM. Power on the kit with jumper JP2 off and press the RS key. Then enter 0200 to set the address and press DA to go into data mode. Next, enter the numbers above pressing the + key after each number pair (so, enter A9 + FF + etc.). Before running, I strongly recommend checking the values. Use AD to go back into address mode. Press 0200 again and use + repeatedly to check all entered values. Once satisfied, press 0200 and GO. If all goes well, you will see a very bright 8 as first digit on the LED display (in later tutorials I will explain why). Displaying a single digit on the Micro-KIM Obviously constructing and entering programs this way is tedious and error-prone.

Micro-KIM Tutorial: Getting Started

Image
Perhaps reminiscing the past is a sign of getting older, but I cannot help but look back fondly at the times I learned programming machine code on the Commodore 64 in the eighties. Therefore, it is probably no surprise I still occasionally enjoy programming 6502 on the Micro-KIM, which is a modern replica of the seventies KIM1 microcomputer, made available by the well-known retro computer kits provider  Briel Computers . In fact, I am having so much fun with this board, I decided to write a series of tutorials on operating and programming the Micro-KIM. In this series, I assume you have already some experience with the Micro-KIM and 6502 machine code, and have read the basic documentation that is shipped with the kit. Other than that, I hope to give additional information on various topics, such as developing assembly programs, programming the display, using the RS232 port or keypad, setting up timer-based interrupts, using a cross-assembler to generate programs in paper tape fo

Micro-KIM weekend

Image
A rainy weekend was a perfect excuse to play with my micro-KIM, which had been collecting dust in a drawer for too long. I had fun using my own cross-assembler to develop and generate programs in paper tape format, and upload these to the micro-KIM via the PuTTY client. I figured out how to use the 6532 RIOT to set up a timer-based interrupt service, which is an important step in separating actual computation from display and keypad handling. The following clip shows the difference between incrementing a three-byte memory counter at roughly 1000 times per second (timer delayed) and 100,000 times per second (full speed with about 10 cycles per iteration at 1MHz). Perhaps a nice illustration of how fast even those early computers were.

New Buttons for Chess for Android

Image
Not everyone was happy with the "swipe-up" to open the options menus (for devices that lack a menu button, or that broke the legacy options menu altogether), so I decided to simply implement an on-screen button instead. I also improved the graphics in the on-screen buttons for navigation, something that as long overdue. The result is shown below. The right-most button with the horizontal lines opens the new-style options menu. As before, the other buttons are used for navigating the game, see the manual for details. On devices that still support a physical or virtual menu button (vertical dots in the screen-shot below), that button opens the legacy options menu. Expect a similar update for Reversi and Checkers for Android soon too.

Chess-playing Robotic Arm

Image
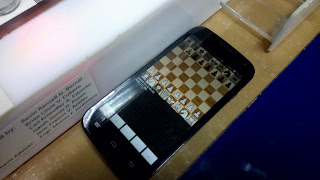
A while back I got an email from Isaiah James D. Puzon, a computer engineering student at the Philippines FEU Institute of Technology, with a minor request for a new feature in Chess for Android that would help with his thesis project: a chess-playing robotic arm. It was very rewarding to receive pictures from his exciting working prototype a few months later. You did a great job building this robot arm, Isaiah. Congrats with your graduation and good luck with your further career!

Opening Books in Chess for Android

Image
I got several questions on how to use the opening book features in Chess for Android , so I hope this blog posting will be useful. By default, the GUI uses a built-in opening book before it consults any chess engine, either the built-in Java engine, or an imported third-party chess engine. This small built-in opening book (consisting of few opening lines I studied a long time ago as a young member of a chess club, by the way) provides some variety of play, but otherwise is probably not sufficient for the more serious chess player. Therefore, before using an engine's own opening book, one has to disable the GUI opening book, by disabling the "Use Book" choice in the options menu, as shown below (touch to remove the check mark). It may seem a bit counter-intuitive to disable the "Use Book" feature in order to use an engine's opening book, but without doing this, the GUI will first consult the built-in opening book before consulting the engine, so

Checkers for Android Animation

Image
I have also improved the graphics and animation in Checkers for Android. You can see the result in the video below. Both the reversi and checkers updates are now available on Google Play .

Reversi for Android Animation

Image
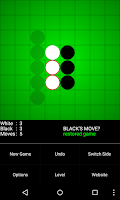
Reversi for Android is getting a graphics overhaul! The "retro stones" have been replaced by stones with a gradient. A new animation on placing and flipping stones makes it more clear what moves just have been played. Except an update on Google Play soon!

Android Applications Updates

Image
I just released new versions of my Android applications, as usual available on Google Play or as direct download . These versions introduce a new options menu dialog that can be accessed by swiping up. Hopefully this provides a viable alternative on devices that lack or broke the legacy options menu button. Reversi for Android v2.5.5 Checkers for Android v2.6.5 Chess for Android v5.1.5 Chess for Android also introduces a slightly cleaner position set up window, and added the ability to define an opening book for an imported UCI or XBoard engine. Please let me know if all works well.

New Options Menu

Image
In order to ensure my games remain relevant as the old options menu is phased out by some vendors, I am adding new support for action buttons and feature selection. As shown below for the upcoming Reversi for Android update, in addition to the old options menu entered by pressing the menu button, the user can now swipe up to enter a new dialog with action button, check boxes and a drop down box for the levels. I am not just excited about making sure that users can enter this menu again, but also about the fact that this probably makes the features much more discoverable for my users. For Chess for Android, it will look something like this. Expect updates on all my games soon!

Working on Chess for Android Again!

Image
I am getting excited about adding new features to Chess for Android again! I am in the process of working around the menu button issue on Samsung devices. Furthermore, I am extending UCI engine support with the ability to set a book opening for each engine, as well as allowing a wider variety of number of threads (six in the example below). If you have any urgent feature requests for engine support, this would be the right time to ask.

Android Applications Update

I just released minor updates for my Android applications, as usual available on Google Play or as direct download . These versions allow opening the options menu with a simple "swipe up" gesture over the screen. Chess for Android also fixes a problem with importing engines. Reversi v2.5.1 Checkers v2.6.3 Chess v5.1.2 As some background, my applications still use the older options menu, introduced in the days that Android devices still had a physical menu button. Newer models without a physical button sometimes allow accessing the options menu through a virtual button (shown as vertical dots) or through long-pressing the activity switch button, or sometimes don't provide an easy way at all. This release hopefully makes accessing the options menu easier again. Note that, apparently, a recent Samsung update broke the options menus completely for any application (not just mine) on some models (like the Galaxy S6 edge). This update does not fix that problem. I