Posts

Showing posts with the label KIM-1

Micro-KIM Tutorial: The Memory Map

Image
Let’s revisit the Micro-KIM memory map, introduced in the third tutorial. +-----------+ | 2K EPROM  |$1fff | monitor   | | program   |$1800 +-----------+ | 6532 RIOT |$17ff | I/O, timer| | and RAM   |$1740 +-----------+ | optional  |$173f | I/O, timer| | and RAM   |$1400 +-----------+ |           |$13ff | 5K RAM    | |           |$0000 +-----------+ Since the default kit (without any expansion) only uses the lower address bits to access 8K, memory repeats itself every 8K. You can verify this by storing and inspecting values in, for instance, addresses $0000 and $2000. Any value stored in one address will show up in the other. Although an interesting factoid, there is no reason to let Micro-KIM programs address anything outside the range $0000-$1fff. Addresses $0000-$13ff contain 5K free RAM (another interesting factoid: the Micro-KIM actually wastes 3K of its 8K RAM chip to keep compatibility with the original KIM-1). This memory region can be used to store da

Micro-KIM Tutorial: Available as Single PDF

If you were following (and hopefully enjoying) the Micro-KIM tutorial, you may have noticed a rather long silence after the last posting. Unfortunately, my day job and a move plus remodeling claimed most of my spare time. However, I plan to continue the tutorial really soon again! In the meanwhile, I have made all previous tutorials available as a single PDF on my Micro-KIM website , where you can also find the source code of all examples. Future tutorials will be added to this PDF to keep the collection available as a single file.

Scrolling utility for the micro-KIM

Image
I had been working on some general utilities for the micro-KIM , and used some spare time during the long weekend to finish a scrolling putchar utility that can output letters and digits to the 7-segment display in a scrolling fashion (some letters needed more improvisation than others, but my daughter Karina helped me designing all the letters and converting them to hex). Here is a demo.

HELLO Micro-KIM

Image
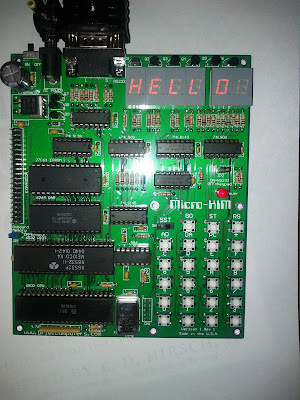
The Micro-KIM arrived today! I did some initial experimentation with my 6502 cross-assembler and was happy that the paper tape format l recently added could be uploaded to the device without any problems. What better first program to write than "HELLO WORLD" (except only HELLO fits on the display)? It was fun figuring out how to control the display using low level 6502 programming.

Paper Tape Format Disassembler

I have extended my cross-assembler with a built-in disassembler that can directly read from paper tape format (and a few other formats). For example, the following test assembly program       .org $0200       ldx #100 loop  dex       bne loop       brk is, under option -P, assembled into paper tape format (text representation): ;060200A264CAD0FD0003A5 ;0000010001 Option -dP activates the disassembler on paper tape format represented as text, which disassembles the format above back to: $0200 a2 64  ldx #$64 $0202 ca     dex $0203 d0 fd  bne $0202 $0205 00     brk

Paper Tape Format

As a present, my wife ordered the Micro-KIM from Briel Computers for me, which is a modern replica of the KIM-1 microcomputer. Even though I learned machine code on the 6510 of the Commodore 64, I remember seeing the KIM-1 in an electronics store much earlier, and I was intrigued right away. I can't wait for it to arrive to do some vintage programming. In anticipation of the Micro-KIM's arrival, I extended my 65xx cross-assembler (available for Windows, Linux and MacOS) with the paper tape format , either in the original binary format (option -p) or in a text representation (option -P) so that its output can feed directly into the Kim's terminal interface. I simply generated the format based on old documentation and it is still untested. If someone is interested in trying it out, I would appreciate early feedback. Otherwise, I will report back when I get my Micro-KIM. For example, using the assembler on this little test assembly program: .org  $0100 .byte $FF $E