Posts

Showing posts from 2016

New Chess Graphics for Chess for Android

Image
Bryan Whitby, who contacted me earlier to tell about very cool USB chess board projects , contacted me recently with a very generous offer to use his awesome chess graphics in Chess for Android . I am very thankful, since these graphics look really good, and combine well with the various board types already supported. So, expect an updated on Android Play and my website really soon! And, thank you Bryan!

Micro-KIM Tutorial: Brightness of LED Display

Image
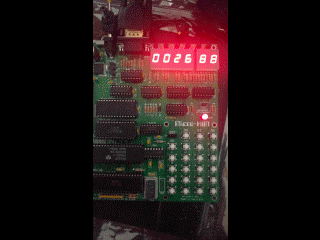
A demo is a program that shows off the abilities of a computer or programmer, sometimes even beyond the limits of an original architectural design. For example, a well-known demo theme on the Commodore 64 consists of rendering sprites in the border, i.e. outside the area originally destined for rendering sprites. This tutorial presents demos that use the LED display beyond its (probable) original purpose: adjusting the brightness of characters or even segments. As shown in the previous tutorial, a refreshing loop is necessary to show all 6 characters on the LED display. Here, the refreshing rate directly defines the brightness of these characters. Simply looping around yields maximum brightness, while lowering the refresh rate dims the screen. This idea can also be used to adjust the brightness of parts of the LED screen (characters or even individual segments within the characters). To illustrate this effect, let's modify the program of the previous tutorial (the source

Micro-KIM Tutorial: The LED Display

Image
The following schematic illustrates what is fun about retro computing: the complete schematic of a microcomputer fits on a single page (a higher resolution PDF can be downloaded from the Briel Computers website). Micro-KIM Schematic. Courtesy Vince Briel - Briel Computers The schematic shows that the 6 character LED display is controlled through some selection logic by the data ports of the 6532 RIOT. Because the 16 pins of the two 8-bit data ports A and B would not have sufficed to control all characters in the LED display simultaneously, instead a few bits of B select one character (value 9 selects the first, value 11 the second, etc.) while the lower 7 bits in A are used to control the 7 segments of that particular character (bit 0 controls the top segment, bit 1 upper right segment, etc.). Note that with this scheme, it is possible to set one character and "go on with the program", as I showed in an earlier tutorial by displaying a very bright 8 in the

Micro-KIM Tutorial: The Monitor Program

Image
A simplified memory map of the Micro-KIM is shown below. This tutorial explores the 2K EPROM,  leaving a more detailed exploration of the free RAM and 6532 RIOT for later.  Address space $1400   to   $173f  is unused i n the standard Micro-KIM kit configuration.    +-----------+   | 2K EPROM   |$1fff   | monitor   |   | program   |$1800   +-----------+   | 6532 RIOT |$17ff   | I/O, timer|   | and RAM   |$1740   +-----------+   | optional  |$173f   | I/O, timer|   | and RAM   |$1400   +-----------+   |           |$13ff   |  5K RAM   |   |           | $0000   +-----------+ Addresses  $1800 through  $1fff  are taken by the 2K EPROM, which is a read-only memory area that stores the 6530-003 and 6530-002 parts of the monitor program. You can, of course, inspect all  individual bytes in the address mode on the Micro-KIM kit, but I recommend reading the assembly listing of the monitor program in the appendix of the Setup and User's Manual of Briel Computers. The c

Micro-KIM Tutorial: A First Assembly Program

Image
At the lowest level, the 6502 executes numerical machine code. For example, the following bytes in hexadecimal format constitute a simple program that displays a single 8 on the LED display of the Micro-KIM.   a9 ff 8d 40 17 a9 09 8d 42 17 4c 0a 02 Let's enter this program into the memory of the Micro-KIM. Power on the kit with jumper JP2 off and press the RS key. Then enter 0200 to set the address and press DA to go into data mode. Next, enter the numbers above pressing the + key after each number pair (so, enter A9 + FF + etc.). Before running, I strongly recommend checking the values. Use AD to go back into address mode. Press 0200 again and use + repeatedly to check all entered values. Once satisfied, press 0200 and GO. If all goes well, you will see a very bright 8 as first digit on the LED display (in later tutorials I will explain why). Displaying a single digit on the Micro-KIM Obviously constructing and entering programs this way is tedious and error-prone.